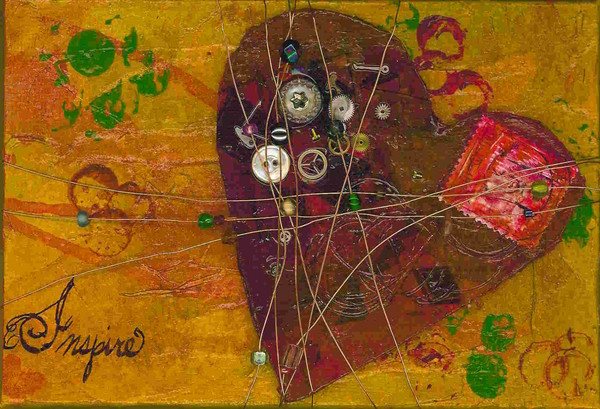
These encaustic paintings are among a group that will be for sale at TheArtery in the Bucktown Center for the Arts in Davenport, IA. The four in the black stands are painted on ceramic tile and the one in the back is on cradled wood.
This morning I played around with scraping back a wax surface to random blobs of colored wax I'd sprinkled across the surface. As I was scraping it reminded me of one of my favorite childhood candies, Brach's Jelly Nougats.
The candy I remember
This experimentation came about because yesterday I bought Lissa Rankin's book Encaustic Art and I am so pleased that I did! Somehow I had the impression it was simply a collection of interviews and artwork, but, of course, it is so much more.
Thousands of candles can be lit from a single candle, and the life of the candle will not be shortened. Happiness never decreases by being shared. - Buddha
The house is quiet today, but my mind is racing with ideas for the new year. While making plans for the future with my art and fledgling business, I'm going to make a more conscious effort to stay grounded in the present. It is so easy to retreat into inactivity, which doesn't permit me to make those steps forward that I know I can accomplish.
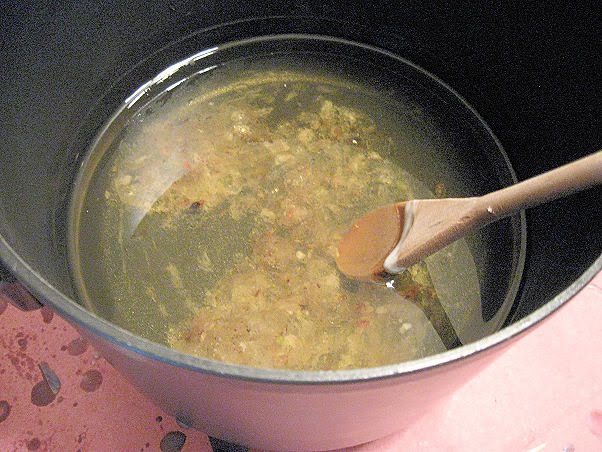
Thought of being more economical with food - not letting leftovers languish in the refrigerator - led to potato pancakes:
Gifts of new wax has my creative juices flowing: R&F encaustic paints - Iridescent German Silver, Ultramarine Blue, Cobalt Violet Deep, Celadon Green, Jaune Brillant, Alizarin Crimson, Cobalt Yellow, and Viridian.
Watercolor pencil & paint spattered paper towels
Hamsa of zentangle-inspired doodles
Make art everyday:
I have several art journals in progress right now.
These two pictures are from the "Make Your Mark" traveling journal, sponsored by Dick Blick and the LaGrange Art League. I have 9 months to work in and share the journal. At the end it will go on display with other artist's journals and travel among Art Leagues in the Chicagoland area.
... to not have blogged over the past four months - other than the usual business of life, Well, that and keeping up with friends and family on Facebook, rather than posting here. So I'm acting on a decision to get a move on and post here as often as possible - maybe not daily, but certainly I can manage a weekly of post.
We have a new member of the family - Jennie! She and Kyle were married in October. Here is the happy couple.
A few weeks ago, I presented a demonstration at the Kishwaukee Valley Art League's December meeting. My topic was "Encaustic Painting and Collage". It was the first time I'd done such a demo for my art friends in a public setting.
dipping paper into hot wax
working on a ceramic tile
Today I plan to finish up my section of a Traveling Artist Journal. Our journal was started by fellow FusedChicago artist, Jenny Learner. So far we have the artwork of Jackie Hefty (owner of Whispering Woodlands) and Bridgette Guerzon Mills. Over the weekend I'll add some photos of my journal pages. Time to get back to work on it so I can get it to Jenny this weekend.
Yesterday was a busy and enjoyable day in the 'burbs. Attended an organizing committee meeting for FusedChicago at Mary's home. Then on to Elyse's house to drop off my artwork for the FusedChicago show at The Art Center in Highland Park, IL. Here's the blurb from their site:
September 3rd - October 1st, 2010
Opening Reception: Saturday, September 11th from 6:00 - 9:00pm
"Encaustic: Hot Art" is an exhibit of work by members of FusedChicago, a group of area artists whose practice involves using layers of pigmented beeswax and a heat source. Since the turn of the 21st century, there has been a resurgence of interest in this ancient medium. The exhibit showcases the wide and current variety of techniques and methods artists are using as they work in this increasingly popular medium.
Today I finally took the plunge and worked on some handmade encaustic medium for my next series of paintings. I'd run out of commercial medium and had decided earlier this summer that I would just make my own, as it was more economical. So, today I followed a traditional recipe of 8 parts beeswax to 2 parts damar resin crystals. I ended up making two batches this afternoon, so now I have 24 muffin-sized cakes of medium and 2 small "loaves".
Here I am stirring the sticky melting resin crystals into the melted beeswax. Notice the dirt and bark that will be strained out of the mixture through cheesecloth after the wax and resin are completely combined.
This is a shot of the hot liquid medium right after I poured it into an old muffin tin and a foil loaf pan. (Neither will ever be used for food again!) I had a feeling the medium would be difficult to remove from the foil - and it was - so with the next batch I poured the extra into a metal loaf pan. Much better results that time. It took about 2 hours for the wax medium to cool and harden in the kitchen even with the A/C on. When the bottom of the pans were cool to touch I tapped them lightly with whatever tool I had handy and the wax popped out smoothly.
Here's a shot of Batch One of my handmade encaustic medium - Tah-dah! I was really quite pleased with myself and set about making Batch Two right after lunch. (I am easily amused!)
A special thanks to Jaime Lyerly for posting her foray into handmade medium and to Susan Crouse-Kemp for her video "Making Encaustic Medium".
Carolyn Krueger (owner of The ARTery Gallery at the Bucktown Center for the Arts in Davenport, IA) did a great job hanging my acrylic and encaustic paintings on the 8' wall space I've rented. I'm looking forward to visiting monthly for "Final Fridays".


